Quick Links
On the third day in FDI inThe Operator, can you now tell who is good and who is bad? Is Hacker Hal really trustworthy? Is Supervisor Xavier someone you should be suspicious of, or is Director Mike Trench threatening you behind a friendly facade?
As you delve deeper into solving cases, you may find yourself caught in a whirlwind. Cases are increasingly interconnected, and your operator system sometimes leaves you in the lurch by missing crucial information. If you’re ready, this chapter will bring more surprises and a race against time. Let’s get started!

How To Solve The Facility Case
When you finish the second day, you’ll see a cutscene where Supervisor Xavier mentions to someone that you’re starting to ask too many questions. It seems your secret dealings with Hal have caught their attention. Begin the third dayby logging into your system as usual.The first person to call you today will be Director Mike Trench.
After a brief conversation with him, you’ll receive a call from one of the agents you talk to the most, Barry Walker. He’ll inform you that the BioM Facility, whose address you provided him yesterday, has been set on fire. He will send you the Facility folder, andyour current objective is to prove that it was an arson attack.

Open and watch the video file named ENTRANCEinside the folder. It’s a rather long video. First, go to around frame 32 andstop the video when the person enters through the door.You’ll see him entering a code into the keypad on the right side of the door.Click on the keypad, and the system will analyze it,revealing the code to be 014485.
Then, around frame 35,click on the item the suspect is carryingand let the system analyze it. You’ll see a window labeled JERRYCAN. Next, select the ‘Prove It Was Arson’ text above andchoose the object image in the Jerrycan window.

Agent Walker will ask for the ID of the person, but when you can’t find it, he’ll decide to enter the facility and ask you for the door code. Select the ‘Find The Code’ text above andtell Agent Walker the code 014485.
During the conversation, Agent Walker will ask for more information about the arsonist.Go to 04:11in the video andstop it when the person who entered initially is seen exiting the door.Click on their face, and in the Suspect window, click on their face again, butyou’ll get a ‘No Match’ warning.

This person looks a lot like the one from the garage shooting case involving Wells, where you also got a ‘No Match’ warning when analyzing the face. Now,open the Parking folder and the file named Killer.Click on ‘Find More Info On Arsonist’ andlink the suspect’s image in the Killer window.
After viewing the photo of Connie sent by Agent Walker, your conversation will end, and just as you’re about to talk to Supervisor Xavier Skinner,Hacker Hal will intervene.Hal will tell you that there’s a mole in the Operator program. He’ll also mention that he plans to trap the person who killed Wells in the garage and set fire to the BioM facility.

However, he’ll need you to access the computer in the evidence room for this. After your conversation with Hal,click the Log Out button to shut down your system.This will cause Evans to head to the evidence room.
How To Hack The Evidence Room Computer
The first thing you need to do ispress the A key associated with Authenticate to log in.Just like logging into your own system at the start of each day, press random keys to fill the User and Password fields, then press Enter.
Return to the main screen, and you’ll see an error message on the screen.Press the H key for Help.This will reconnect you with Hal. Tell Hal you received an error message. Hal will update your credentials, and you’ll be able to view the files. Your current task is to check the hidden column andmake any evidence related to the Facility case visible.

If yourevert the fire report to access its redacted information, you’ll unlock the ‘Reverted Fire Report’ achievement.
To do this,go to the case file ID G1669belonging to Bwalker. Press the Tab key tomove to the Evidence Listing section.You’ll see that the Hidden column next to the row named HDD is marked as ‘True’. Press Enter, navigate to the Hidden column andpress Enter again to change it to ‘False’.

Then press the Escape key to return to the main screen andpress H to return to the Help screen.Inform Hal that the evidence is now visible. Your next task is to find the redacted name on Henry Jenkins’ list and change the relevant file to its uncensored version. First,go to the case file ID G1921 belonging to APendell.
Press Enter, thenpress the Tab key to navigate to the Name_List section.Press the Tab tomove to the History sectionof the window.Navigate to row 001, where the Comment section says ‘Evidence Registration’.Press Enter to change its version.

Then press Escape, and press H totalk to Hal again.This completes your task in the Evidence Room. Close your conversation window with Hal andpress L to log out of the system.After a short cutscene, you’ll return to your own computer.
Log into your system and start by chatting with Hal. Your current objective is toexamine the evidence you made visiblein the Facility case. First,open the Bar folder, then open the Name_List file.You’ll see that the redacted name is Sacha Cole. Nowclick on the HDD folder.

While the files in the HDD are loading, Hal will ask you about the redacted name.Select the ‘Give Censored Entry’text above andlink it with Sacha Cole’s name in the list.After discussing Sacha Cole with Hal, your next task will be to open Connie Moore’s password-protected file.
How To Open The Connie Moore’s File
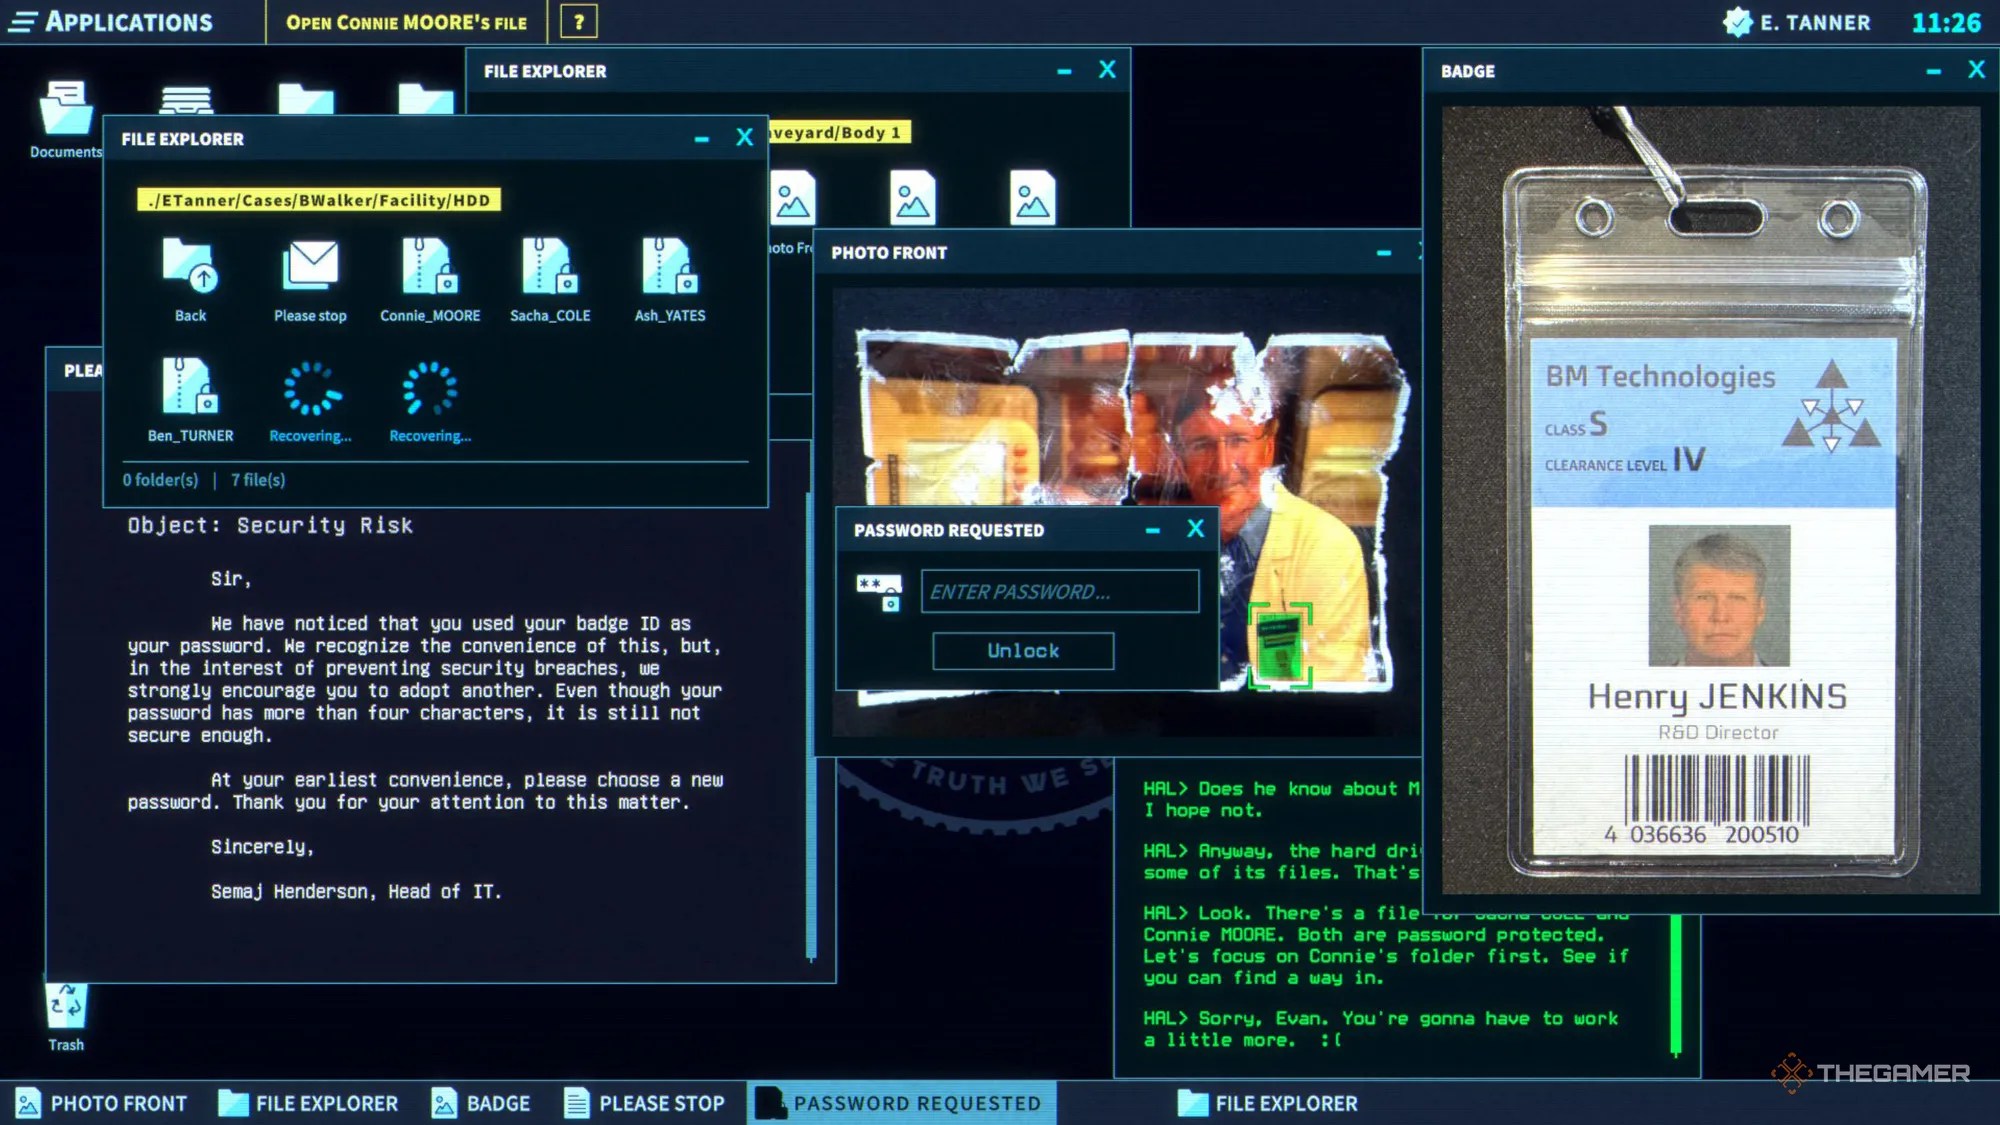
First,open the ‘Please Stop’ file on the HDD.This email mentions that Henry’s password is the same as his Badge ID. To view Henry’s Badge ID,open the Graveyard folder, then the ‘Body One’ folder inside it.
Open the ‘Photo Front’ file to see a photo of him wearing a lab coat and his badge.Click on his badge to analyze it.The number on the badge will be revealed as'4036636200510’, which is also the passwordfor the Connie Moore file on the HDD.
Your next goal is to find information or an address in Connie Moore’s file to lure the mole and Ghost into a trap. Inside the file, there are two documents: ‘Overview’ and “Notes'. You willsee an address at the very bottom of the Notes document.Link it to the ‘Find Address For Trap’ task.
After finishing your conversation with Hal, it’s time to move on to Phase Two of your plan. Tell Supervisor Xavier Skinner that you want toconnect with Agent Pendell. He will then connect you to Agent Pendell. After your conversation, give the address to Agent Pendell.
How To Defuse The Bomb
At 14:55, Agent Pendell will call you again. After a series of events, The Ghost will corner Pendell. Just as The Ghost is about to finish him off, Agent Walker will come to her aid. However, things will escalate, and The Ghost will lock Agent Pendell in a room with a bomb. You need tosave her within 20 minutes.
Supervisor Xavier Skinner will send you the FDI Bomb Defusal Guide, mentioning that there isn’t enough time to read everything. He’s right becausethe guide is very long, so you’ll need to focus on the relevant parts.First, ask Pendell what the bomb looks like and what type of explosive it has.
Using the guide, you’ll learn that thebomb’s archetype is an Autonomous Ticking Device.The first task is to find the bomb’s serial number. Tell Agent Pendell,‘I want you to… Enter a code on the numpad’, andenter ‘0000’ to find the serial code.
After discovering thatthe serial code starts with ABM, refer to the relevant section in the manual. You’ll see that the first step is to disable all ticking-required modules. Follow the Bomb Defusal Guide to instruct Pendell on cutting certain wires:
Deactivate the keypad
Deactivate the display
Disconnect the masses
Disconnect the power
After Pendell thanks you and Supervisor Skinner commends your efforts, you’ve earned a well-deserved break.Click the Power Off buttonon your computer to end your day.
When you successfully defuse the bomb, you’ll unlock the ‘Saved Agent PENDELL’ achievement.
After completing the third day,you’ll also unlock the ‘Third Day’ achievement.
